Helios Explorer
The Helios Explorer allows users to locate documents stored in Helios by following the folder/file path rather than searching. If a user is assigned the Writer role, the Helios Explorer also offers an additional capability to upload new files, delete existing files, create/upload new folders and/or delete folders.
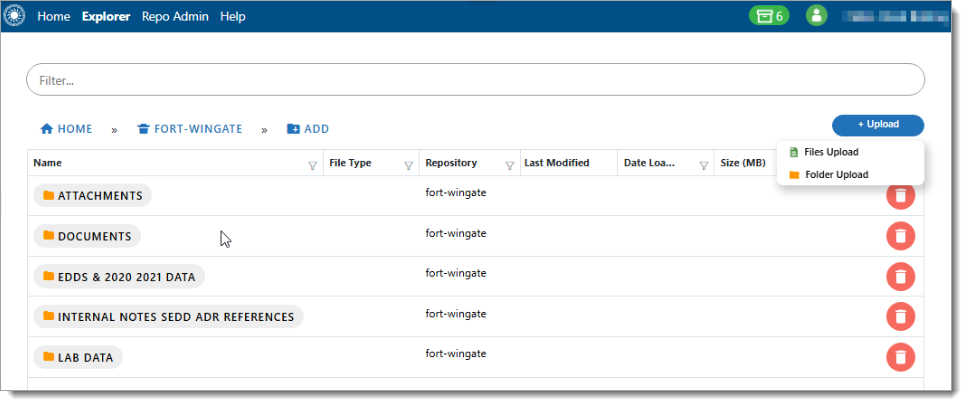
Select Explorer on the Helios header to open the Explorer page. Users will see all the repositories to which they have permission. The total file size and creation date are listed for each repository. Drill down the folder structure to locate desired files.
Note
Total file size will not be displayed for folders in order to improve responsiveness.
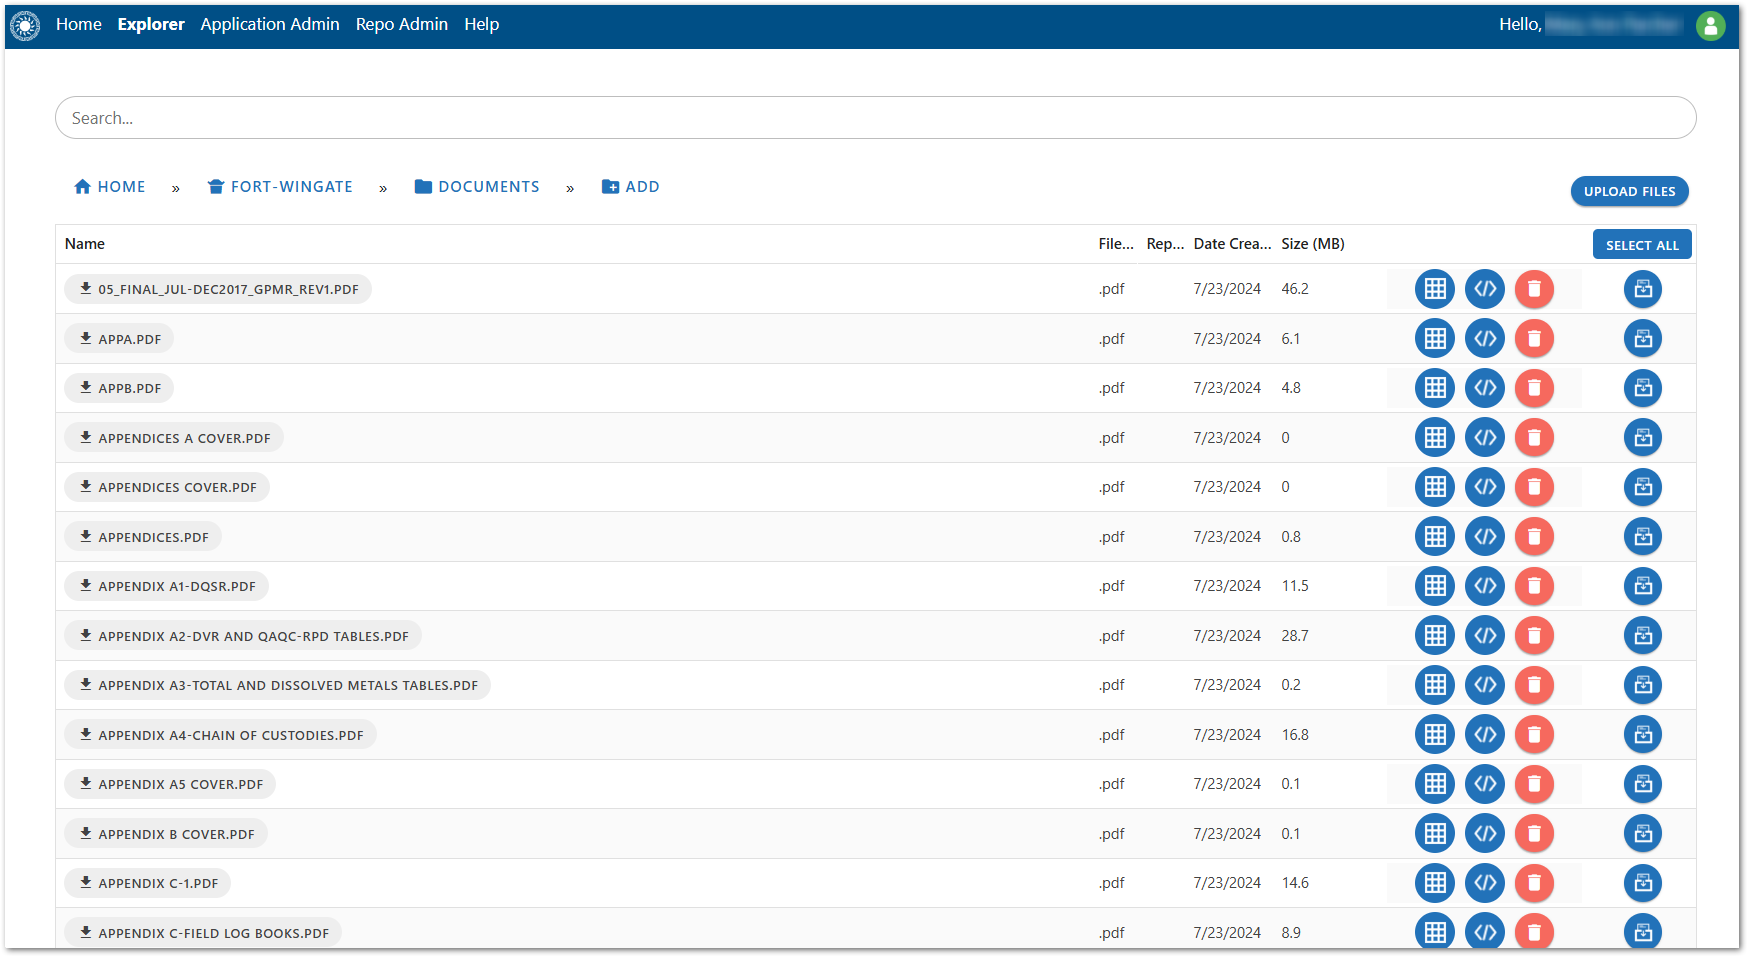
All the documents available within a folder are displayed. Pagination will appear at the bottom of the screen if more files are in the folder than can be displayed on the page.
Files and folders can be filtered by entering text into the Filter bar at the top of the page. Files and folders displaying in the Explorer will be responsive as text is entered.
Actions can be performed on individual files in the Explorer page.
Download Document – Individual files can be downloaded to the local computer by clicking the Download icon left of the file name.
Info – Click the Info icon
 to read the summarized document content in a popup dialog window.
Extract Data – Helios uses the built-in Optical Character Recognition (OCR) for data extractions. By extracting data, users are pulling tables of data from documents and placing them in a Microsoft Excel file.
Click the Extract Data icon
 associated with the desired file to extract any tabular data in the file. The user will receive an email containing a download URL link. Upon clicking the URL link, they will be brought to the Helios site and can download a .zip file containing the extracted data in an Excel file. The URL link will expire in 60 minutes.
Note
- Extract Data functionality is only enabled for supported file types (".pdf", ".jpg", ".jpeg", ".png", ".bmp", ".tiff", ".docx", ".pptx", ".htm", ".html").
- If the selected file(s) does not contain any extractable data, the downloaded zip file will be empty rather than containing an Excel file.
Extract Metadata – Metadata are data that describes documents such as file names, date creation, etc. Click the Extract Metadata icon
 associated with the desired file to extract metadata for that file. The user will receive an email containing a download URL link. Upon clicking the URL link, they will be brought to the Helios site and can download a .CSV file containing the metadata. The URL link will expire in 60 minutes.
Note
Recently uploaded documents will contain basic metadata at extraction if the document has not yet been summarized and processed by the indexer.
DocBox – Users can add individual files to the DocBox by click the Add to DocBox icon
 . Clicking the Select All button will add all files visible on the current page to the DocBox. As documents are added to the DocBox, the Add to DocBox icon will change to a Remove from DocBox icon
  and the DocBox icon will be displayed in the right-hand corner of the Helios header with a count of the files in the DocBox.
Note
If a file cannot be deleted or summary information about the file cannot be displayed, a message will appear after clicking the Delete File icon ![]() or the Info icon
or the Info icon ![]() respectively, indicating that the action cannot be completed.
respectively, indicating that the action cannot be completed.
Users with Writer Permissions
Users who are assigned to the writer role for the repository will have the following additional capabilities:
Deleting Files – To delete any file, click the red Delete File icon ![]() . A message dialog will ask for confirmation prior to deleting the file.
. A message dialog will ask for confirmation prior to deleting the file.
Upload Files – Click the + Upload button and then select to upload files or folders to open the Windows file manager dialog. Select the files or folder (with files) to upload to the current folder in the Explorer. These uploaded files will not have summary content information or other metadata until after the indexer has run at its scheduled time. Any files flagged for Personally Identifiable Information (PII) and/or profanity may not be available until Helios Repo Admin review.
Note
- Folders and files can be uploaded by drag and drop. An overlay appears when a folder/file is dragged into the window.
- If a file size is greater than 250MB, the upload is skipped.
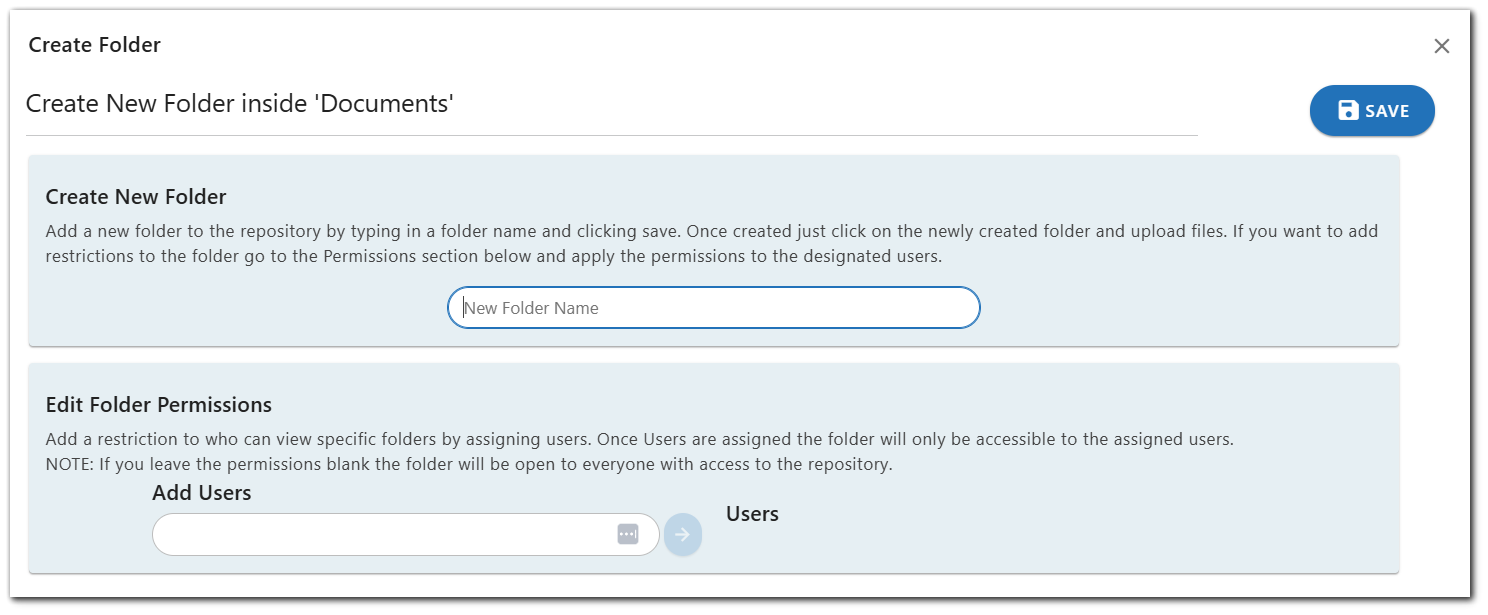
Add Folder – Click the Add button to the right of the folder path to a create new folder. The create folder dialog will open. Empty folders are automatically deleted.
Delete Folders – To delete a folder, click the red Delete Folder icon ![]() . The delete folder dialog will open. Folders can only be deleted if the folder does not contain any files or other folders.
. The delete folder dialog will open. Folders can only be deleted if the folder does not contain any files or other folders.
Important
- If a file with the same file name already exists in the folder, the new file will have a numbered suffix added to the end of the file name before the file extension (e.g., file (1).txt, file (2).txt, etc.).
- Once a file is uploaded to the Helios Explorer, summary content or other metadata will not be available until the next time the indexer is run.
- For security purposes, .EXE and .RAR files types cannot be uploaded to Helios.
- Any files that are flagged for PII or profanity will still be visible in the Helios Search but not downloadable.